How to Install Pole Mounted Street Motif Lights
(No-Drill Methods, Pole Size Fit, and Common Industry Sizes)
Meta Description
Learn how to install pole mounted street motif lights safely—most projects require no drilling. This guide covers common mounting methods, pole diameter fit tips, wind-ready best practices, and standard industry sizes for fast budgeting and planning.
Introduction
Pole mounted street motif lights are one of the fastest and most effective ways to transform city streets, plazas, and commercial districts for seasonal events and festivals.
Before placing an order, buyers and project planners often ask the same key questions:
Do we need to drill into the pole?
Will the motif light fit our pole diameter?
What size should we choose for our street?
This guide explains real-world installation methods used in municipal and commercial projects, along with common industry size references to help estimate budget, scale, and visual impact efficiently.

1) Do Pole Mounted Motif Lights Require Drilling?
In most city street projects, drilling is NOT required.
Why no-drill mounting is preferred
Public light poles often have strict regulations, and drilling may require official approval
No-drill mounting allows faster seasonal installation and removal
Lower long-term risks such as rust points, water ingress, and liability concerns
Typical municipal-grade installations rely on clamp systems and stainless steel banding straps designed to hold securely without damaging the pole surface.
2) The 4 Most Common No-Drill Mounting Methods
Below are the most widely used no-drill mounting solutions for pole mounted street motif lights.
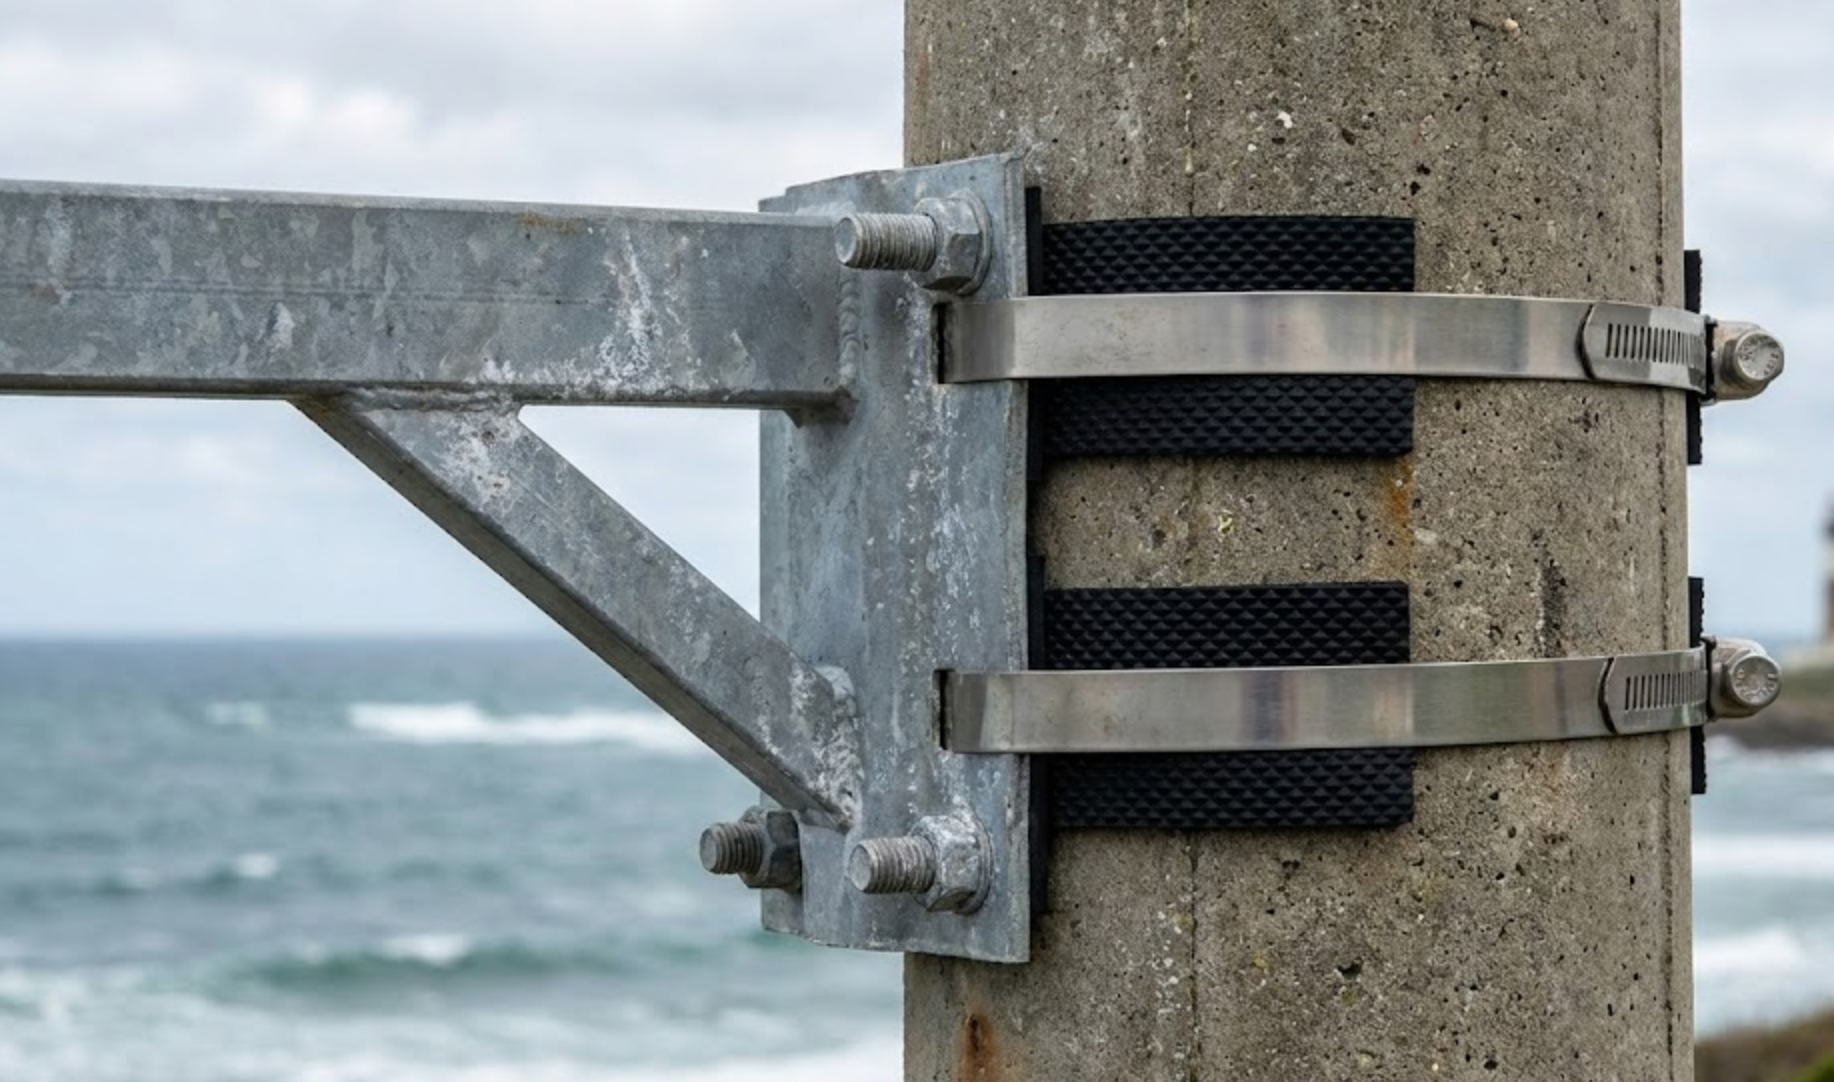
A) Stainless Steel Banding Straps (Steel Straps)
Best for: round poles, tapered poles
Why it works: wide fit range, strong holding force, minimal pole damage
Pro tips: use outdoor-grade stainless steel, add anti-slip pads, and apply double strapping in windy areas
B) U-Bolt Bracket + Back Plate
Best for: round poles with stable diameter, some square poles
Why it works: strong structure, cost-effective, easy to service
Pro tips: always confirm the pole diameter at the exact installation height
C) Custom Clamp Bracket
Best for: special poles, decorative sleeves, non-standard shapes
Why it works: the most secure “made-to-fit” mounting option
Pro tips: provide pole photos, diameter or circumference, and installation height
D) Side Arm / Extension Bracket
Best for: projects requiring extra clearance (to avoid blocking lamps or trees)
Why it works: improves visibility and spacing
Pro tips: wind load increases—reinforce the structure and add extra fixing points
✅ Bottom line:
For most street projects, banding straps or U-bolt brackets are the fastest, safest, and most commonly used solutions.
3) When Drilling Might Be Considered (Rare Cases)
Drilling is uncommon, but may be considered in special situations such as:
High-wind coastal areas combined with large motif surface areas
Extremely smooth pole surfaces where slipping is a concern
Permanent, year-round installations required by the owner
Poles with pre-designed mounting holes
If drilling is required, best practices include:
Anti-rust surface treatment
Waterproof sealing
Clear responsibility and installation records
4) How to Confirm Pole Diameter (Avoid “Doesn’t Fit” Problems)
The most common on-site failure is simple:
the bracket does not match the pole diameter at the mounting height.
Method 1 (Recommended): Measure Circumference and Convert
Measure circumference C at the installation height:
Diameter D ≈ C ÷ 3.14
Example:
C = 314 mm → D ≈ 100 mm
Method 2: Direct Diameter Measurement
Suitable for poles that are easy to access and measure directly.
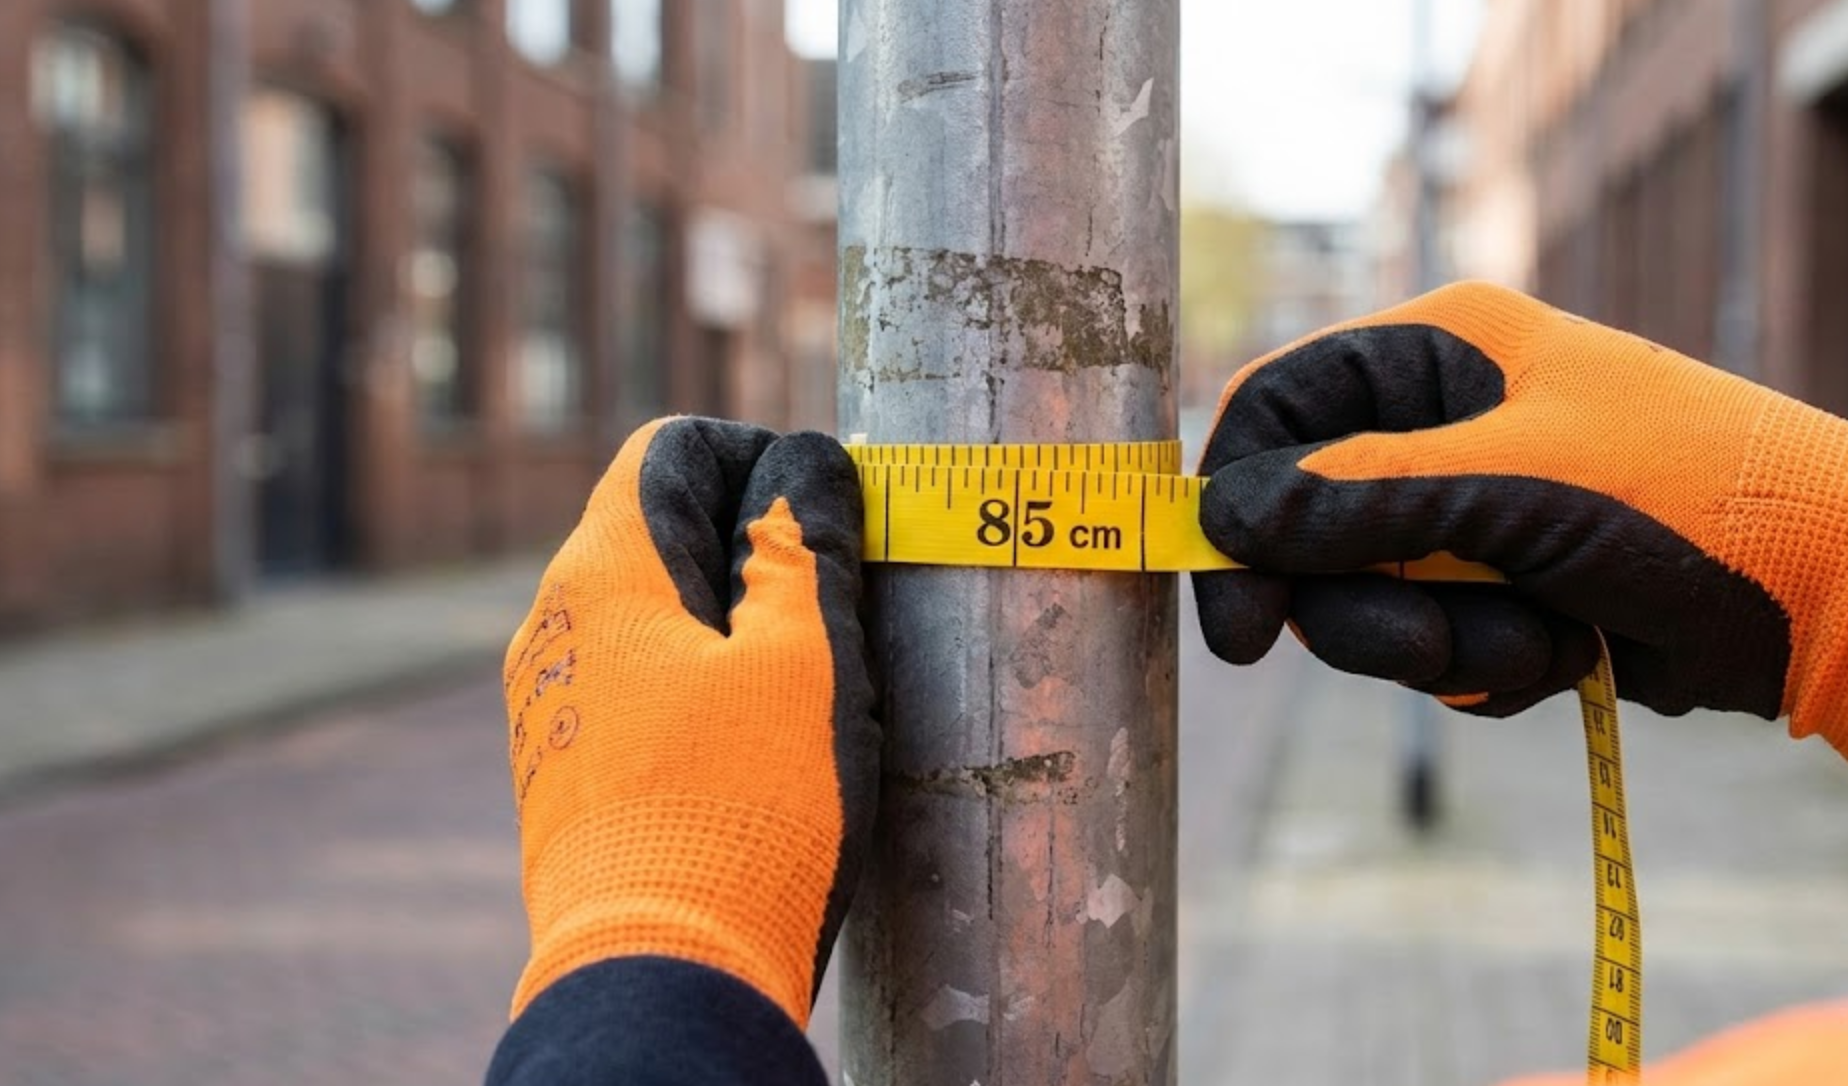
Method 3: Photo + Measuring Tape Reference
Ask the installer to take a photo of the pole with a measuring tape at the exact installation height.
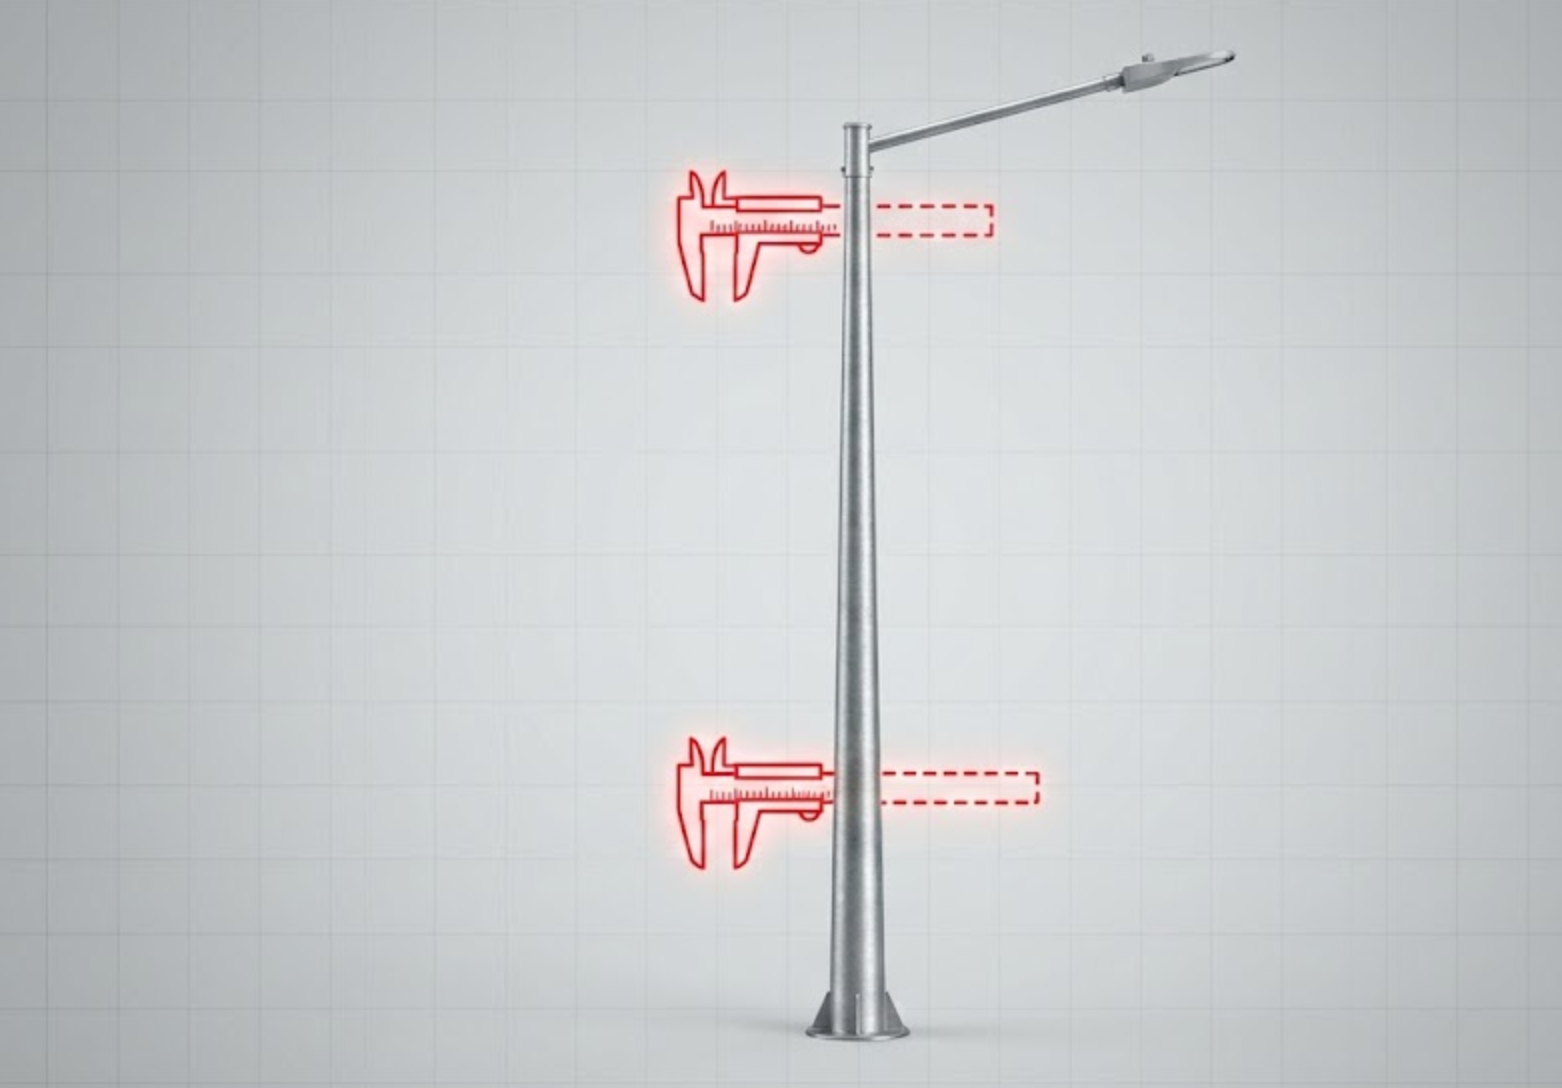
5) Important: Tapered Poles Change Size by Height
Many city light poles are tapered—thicker at the bottom and thinner higher up.
This means diameter must be confirmed at the exact installation height, not near ground level.
For accurate quotation, always include:
Installation height
Diameter or circumference at that height
6) Common Industry Size References (For Fast Budgeting)
Final motif sizes are usually customized based on pole spacing, street width, and local wind conditions.
However, many projects use standard size tiers for fast planning.
Common Height Options (Most Popular)
1.2 m – small streets with dense pole spacing
1.5 m – main streets and commercial districts (most common)
2.0 m – wider roads with stronger long-distance visibility
3.0 m – landmark zones or gateways (reinforced structure required)
Typical Proportion: Width vs Height
A practical design guideline:
Width ≈ 40%–60% of Height
Example:
1.5 m (H) × 0.75 m (W) is a classic, well-balanced ratio.
Symmetrical designs such as snowflakes or stars often use near-square formats.

If you need help selecting the right size tier or planning quantity, you can Get a Free Layout & Quote based on your street conditions.
7) Installation Workflow (Field Crew Checklist)
A standard no-drill installation typically follows this process:
Step 1: Mark Position and Orientation
Face the motif toward traffic or pedestrian flow
Keep consistent height along the street for uniform visuals
Step 2: Mount Bracket and Straps
Fit back plate to pole curvature
Pre-tighten, level the motif, then fully tighten
Step 3: Anti-Slip & Anti-Loose Measures (Critical)
Add anti-slip pads
Use double straps or upper-lower fixing points for wind resistance
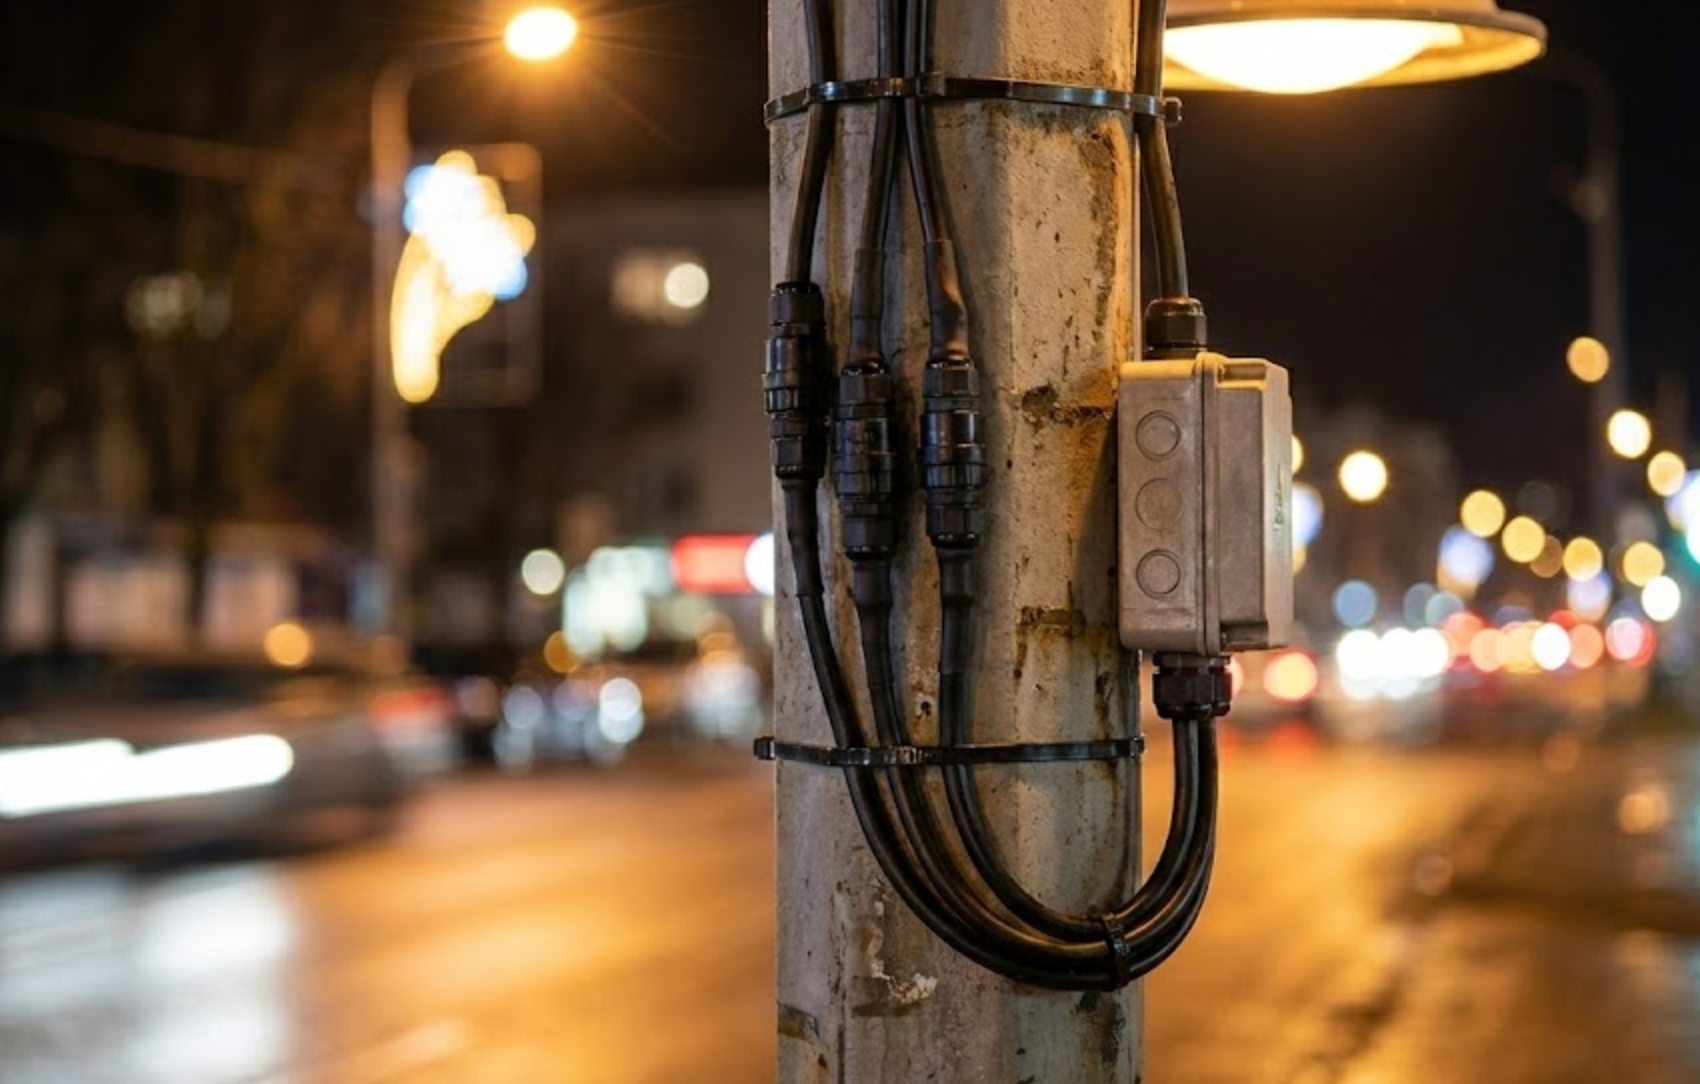
Step 4: Cable Routing and Waterproofing
Route cables behind the pole for better aesthetics
Use outdoor waterproof connectors and proper sealing
Step 5: Power-On Test and Final Check
Check full illumination with no flicker or dark sections
Confirm stability with a gentle pull test
8) What Determines Stability (Wind Safety & Long-Term Reliability)
Key factors affecting stability include:
Motif size and surface area (wind load)
Bracket design (single-point vs multi-point fixing)
Strap material and width (outdoor stainless steel recommended)
Pole surface friction and anti-slip solutions
Installation height and local wind conditions
9) Quick Quote Request Template (Copy & Send)
To receive an accurate mounting plan and quotation, please provide:
Project country/city: ___
Application: street / plaza / park
Pole type: round / tapered / square
Pole diameter at install height: ___ mm (or circumference ___ mm)
Installation height: ___ m
Motif size (W × H): ___ m
Quantity: ___ sets
Voltage: 24V / 110V / 220V
Control: static / flashing / DMX
Wind condition: normal / strong / coastal
Deadline: ___
FAQ (Procurement-Style Questions)
Q1: Do you need to drill into the pole?
A: Most projects use no-drill banding straps or U-bolt brackets.
Q2: What pole diameters can be supported?
A: This depends on the bracket type. Sharing diameter or circumference and installation height allows the correct solution to be recommended.
Q3: How long does installation take?
A: Typically 10–20 minutes per set, depending on height and reinforcement needs.
Q4: Can you provide layout suggestions before ordering?
A: Yes. Pole photos, spacing, and street length are sufficient for preliminary planning.
Call to Action
If you share pole photos, diameter or circumference, installation height, and street length, we can recommend:
A suitable no-drill mounting approach
Recommended motif size tiers (1.2 m / 1.5 m / 2.0 m / 3.0 m)
Estimated quantity and layout direction