


How to Install Pole Mounted Street Motif Lights
No-drill mounting methods, pole diameter measurements, installation steps and common sizes for commercial street decorations.
Pole mounted street motif lights bring seasonal illumination to city roads, shopping districts, public squares and festival streets. Snowflakes, stars, Christmas trees and custom LED motifs can be installed along existing lighting columns to create a coordinated festive display.
Before ordering, contractors and project planners need to confirm three things: whether the pole can support the decoration, which mounting system will fit, and what motif size will suit the street.
This guide covers the main installation methods, measurements and site information required for pole mounted street motif lights in municipal and commercial projects.

1. Do Pole Mounted Motif Lights Require Drilling?
Many pole-mounted Christmas decorations can be installed without drilling into the street lighting column. Stainless steel banding systems and fitted clamp brackets are commonly considered for temporary seasonal displays.
However, a no-drill installation still requires approval from the pole owner or responsible authority. The existing lighting column must be suitable for the additional weight, wind loading and mounting arrangement.
Why No-Drill Mounting Is Often Preferred
- Avoids creating new holes in the lighting column.
- Helps preserve the original surface coating and corrosion protection.
- Can simplify seasonal removal and reinstallation.
- Allows mounting hardware to be adapted to different pole dimensions.
- Reduces permanent alterations to publicly owned lighting infrastructure.
Before installation: Obtain the required permission and confirm that the lighting column, brackets, fasteners and proposed decoration have been assessed for the site conditions. A no-drill bracket does not automatically make an attachment safe.
2. Four Common No-Drill Mounting Methods
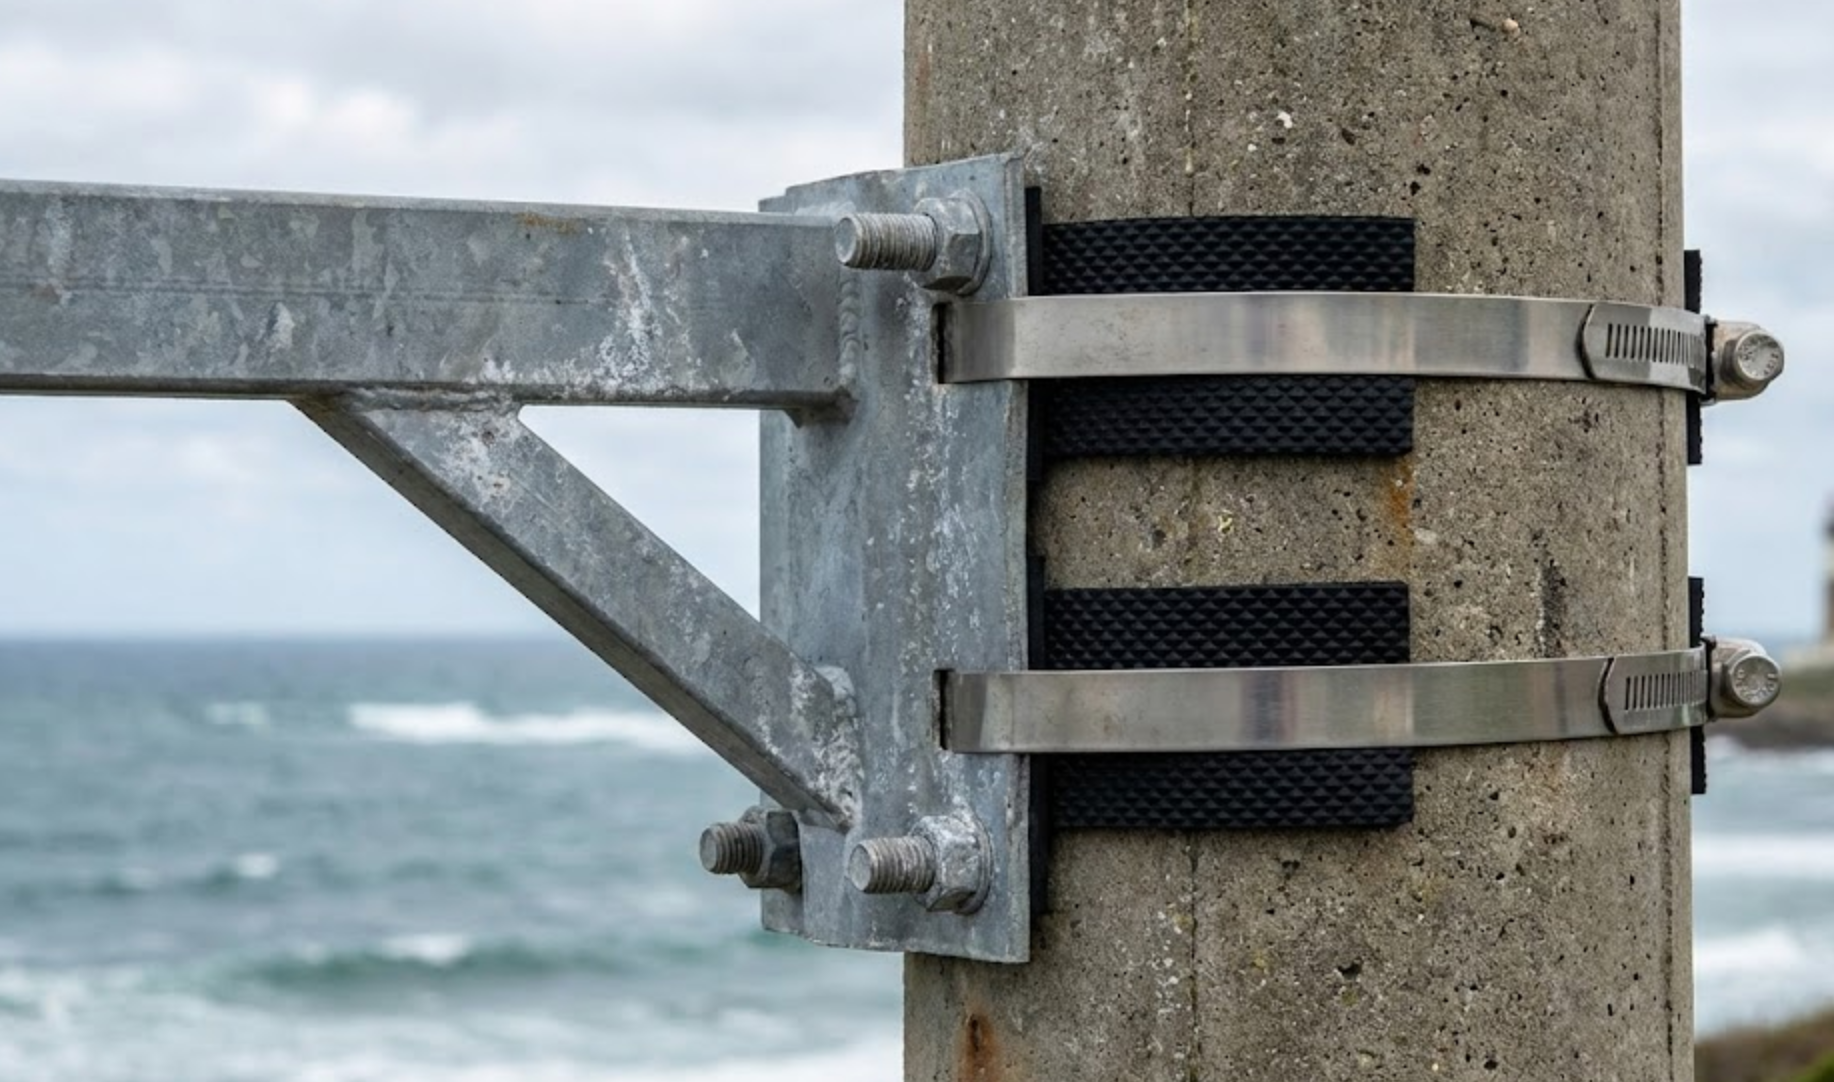
The appropriate mounting hardware depends on the pole shape, its diameter at the mounting position, the weight and dimensions of the motif, and the approved structural arrangement.
Stainless Steel Banding Straps
Typical application: Round or tapered poles where an approved banding system can provide a secure fit.
Stainless steel bands wrap around the column and fasten the motif support bracket. Protective pads may be required to prevent damage to the pole finish and improve contact with the mounting surface.
U-Bolt Bracket and Back Plate
Typical application: Poles with a suitable, measured cross-section and compatible mounting hardware.
A U-bolt and matching back plate hold the decorative support to the column. The bracket must be selected according to the actual pole dimensions and approved fixing requirements.
Custom Clamp Bracket
Typical application: Decorative, non-standard or specially shaped lighting columns.
Custom clamps can be designed around a particular pole profile. Pole photographs, dimensions, surface information and mounting height are needed before manufacturing the bracket.
Side Arm or Extension Bracket
Typical application: Locations where additional clearance is needed around luminaires, trees or other street equipment.
Extension brackets move the motif away from the column. The increased offset can produce greater bending moments and wind loads, so the complete assembly requires structural assessment.
For commercial pole mounted street motif lights, the mounting method should be confirmed together with the selected frame design rather than treated as a universal accessory.
3. When Would Drilling Be Considered?
Drilling may be proposed for certain permanent installations or purpose-designed mounting arrangements. Existing approved fixing holes may also be available on some columns.
Drilling an ordinary street lighting pole should never be treated as a routine solution to slipping brackets or high wind exposure. Unapproved alterations can weaken the column, damage protective coatings and create water ingress problems.
If a drilled fixing is proposed, the pole owner and a qualified engineer must approve the design. Corrosion treatment, sealing, electrical safety and installation records must be addressed before work begins.
4. How to Measure the Pole Diameter
Incorrect pole measurements can delay installation. A bracket designed for one diameter may not fit another, particularly on tapered street lighting columns.
Method 1: Measure the Circumference
For a round pole, measure the circumference at the exact installation height using a flexible measuring tape.
Diameter (D) = Circumference (C) ÷ π
Example: 314 mm ÷ 3.1416 ≈ 100 mm
This calculation estimates the outside diameter of a circular pole. For square, polygonal or decorative columns, provide the actual profile dimensions instead.
Method 2: Measure the Diameter Directly
Where the pole is accessible and the measurement can be performed safely, use appropriate measuring equipment to determine the outside diameter.
Method 3: Provide a Photograph with a Scale
Ask the site team to photograph the pole with a measuring tape or ruler positioned at the intended mounting height. Include a wider photograph showing the full column and surrounding environment.

5. Tapered Street Light Poles Need Height-Specific Measurements
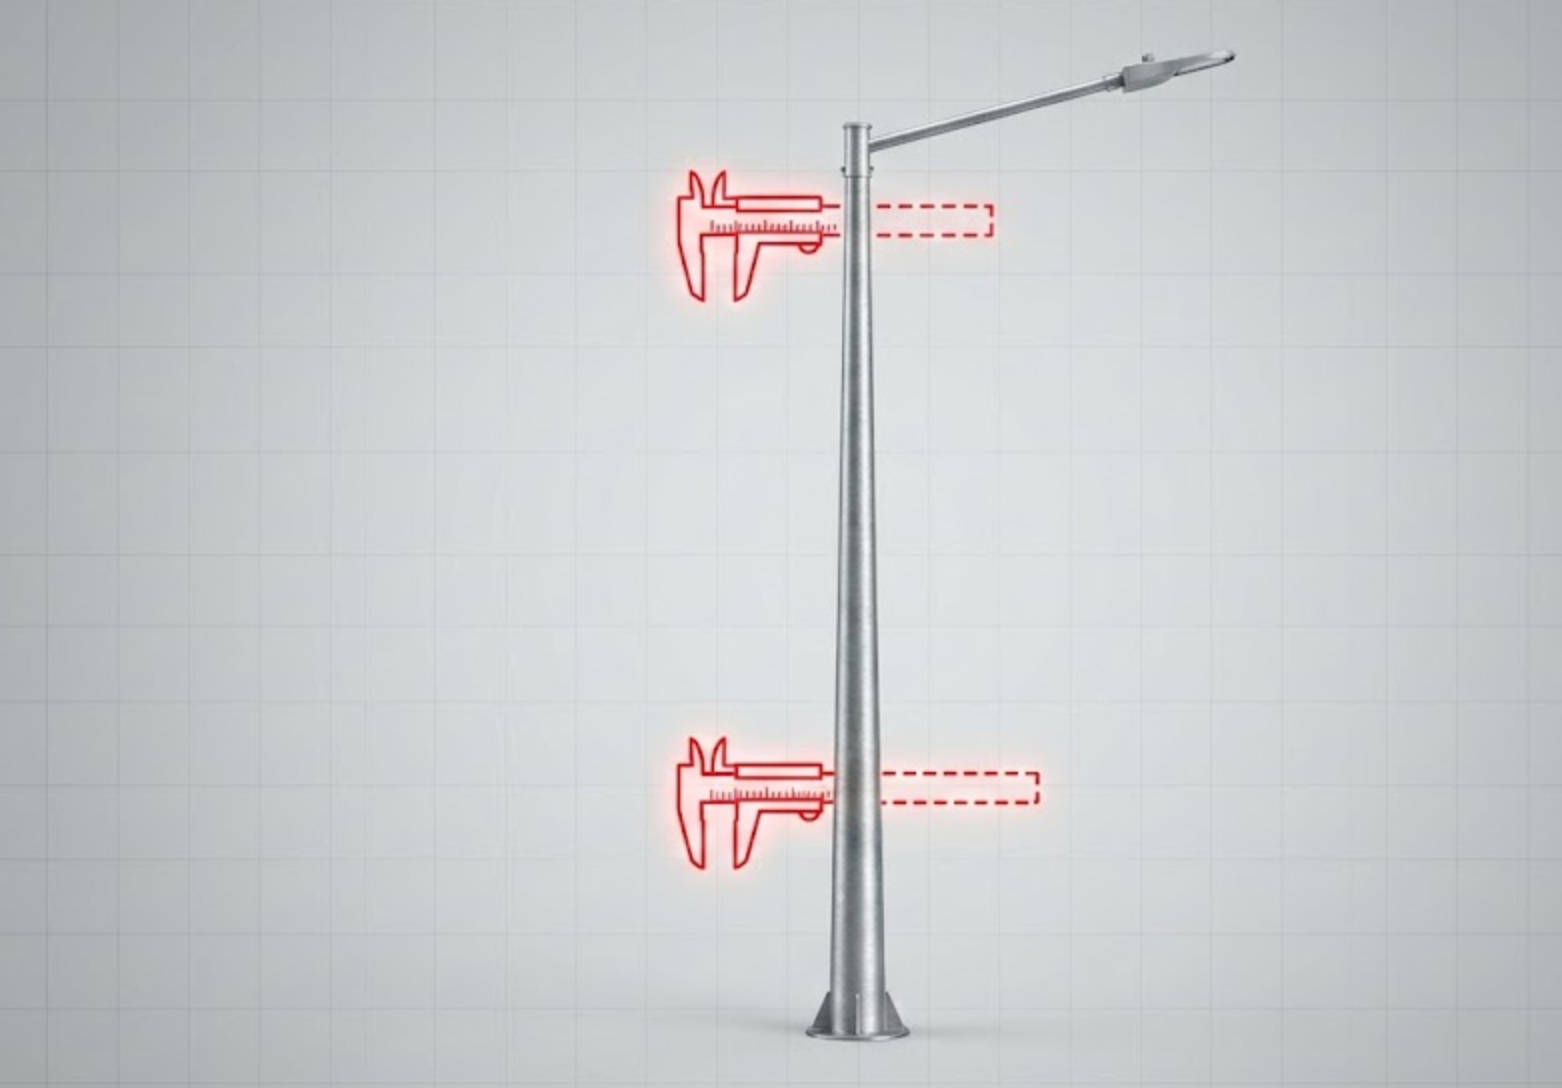
Many street lighting columns have a tapered shape. They are wider near the base and become narrower toward the top.
A measurement taken at ground level may therefore be unsuitable for a bracket installed several metres higher.
Confirm Installation Height
Record the height of each mounting bracket above the approved reference level.
Measure at Each Fixing Position
If upper and lower brackets are used, confirm the diameter at both mounting positions.
Identify Pole Shape
State whether the column is round, tapered, square, polygonal or decorative.
Check Surface and Condition
Provide information about the pole material, coating, existing attachments and visible condition.
6. Common Street Motif Light Sizes
The suitable motif size depends on pole spacing, road width, viewing distance, installation height and available column capacity.
The following dimensions are useful preliminary planning references. They are not fixed industry standards or approved sizes for every lighting column.
| Motif Height | Typical Planning Application |
|---|---|
| 1.2 m | Compact pedestrian streets and locations with closely spaced poles |
| 1.5 m | Shopping districts and standard commercial street layouts |
| 2.0 m | Wider streets and locations requiring greater viewing distance |
| 3.0 m | Large visual features where additional structural assessment and support may be required |
Choosing the Width-to-Height Ratio
For many vertically oriented motifs, an initial design width of approximately 40%–60% of the motif height can provide balanced proportions.
For example, a motif measuring 1.5 m high and 0.75 m wide has a width-to-height ratio of 50%.
Symmetrical snowflake and star designs may use nearly equal width and height. These are visual design references rather than structural rules.
Our custom Christmas street pole lights can be adapted to different street layouts, motif shapes, lighting colors and dimensions.

7. Pole Motif Light Installation Workflow
Once permission, structural suitability and the installation plan have been confirmed, the field crew can proceed using the approved mounting instructions.
Step 1. Confirm Position and Direction
Check the approved mounting height and orient the motif toward the intended viewing direction. Maintain a consistent visual alignment along the street.
Step 2. Position the Brackets
Match the back plate or clamp to the pole profile. Install the specified straps or fasteners according to the approved drawings.
Step 3. Secure the Assembly
Fit the specified protective pads and fixing points. Tighten fasteners using the approved procedure and verify alignment and mechanical security.
Step 4. Route the Electrical Cables
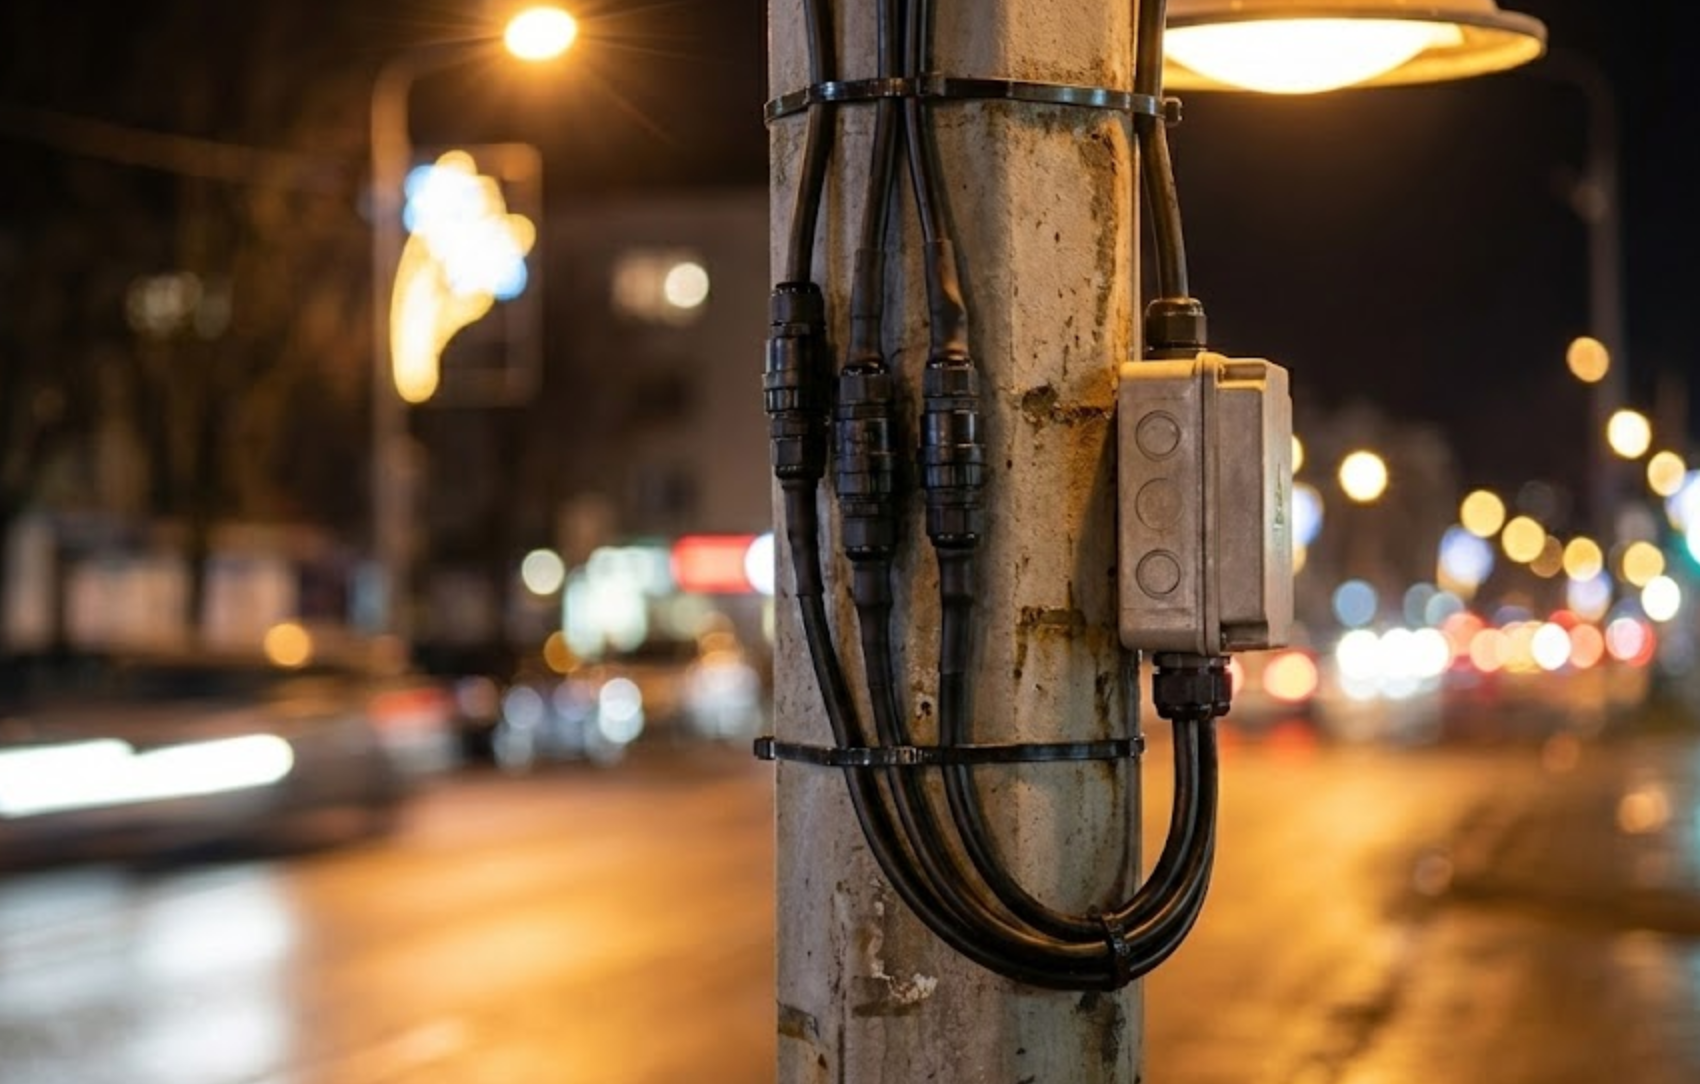
Arrange cables away from sharp edges, moving parts and accessible damage points. Protect the connections with equipment suitable for outdoor operation.
Step 5. Test the Lighting
After the electrical installation has been checked by a qualified person, test the illumination, power connections and selected effects.
Step 6. Record the Final Installation
Document the fixing locations, bracket arrangement, electrical inspection and any required maintenance or follow-up checks.
Installation time varies with the working height, access equipment, motif weight, pole condition and approved fixing system. Crews should plan for the complete installation rather than assume a fixed number of minutes per decoration.
8. Wind Safety and Long-Term Reliability
Even lightweight LED motifs can create substantial additional wind loading when attached to tall street lighting columns.
The mounting system must be assessed as a complete assembly, including the motif frame, offset from the pole, brackets, fasteners and existing column capacity.
- Motif dimensions: larger surface areas can create greater wind forces.
- Installation height: the location on the column affects the forces acting on it.
- Bracket arrangement: fixing-point positions influence the forces transferred into the column.
- Strap and clamp selection: material, width, compatibility and approved fastening details are important.
- Pole condition: corrosion, existing attachments and structural capacity must be considered.
- Environmental exposure: coastal winds, storms and severe weather may require additional precautions.
Important: Adding more straps does not by itself establish a safe wind rating. The approved installation must address the capacity of both the mounting components and the existing street lighting column.
9. Information Required for a Project Quotation
When requesting pole-mounted motif lights for a street or commercial district, the following details help determine the appropriate product design, mounting arrangement and preliminary quotation.
Project Location
Country, city and installation street or area.
Application
Municipal road, pedestrian street, park, plaza or shopping district.
Pole Information
Round, tapered, square or decorative pole, including material and photographs.
Pole Measurements
Diameter or circumference at each mounting height.
Motif Dimensions
Preferred width, height, pattern and LED lighting colors.
Project Quantity
Number of poles, spacing between poles and estimated motif quantity.
Electrical Details
Supply voltage, available power and preferred lighting effect.
Schedule and Site Conditions
Installation deadline, wind exposure, access requirements and known mounting restrictions.
For projects using repeated motifs along long streets, the Christmas tree street pole lights provide another decorative option alongside snowflakes, stars and custom city-themed patterns.
Frequently Asked Questions
Do street motif lights require drilling?
Not always. Many projects can use approved banding or clamp systems without drilling. The pole owner must authorize the attachment and confirm the structural requirements.
How do I choose a bracket for a tapered pole?
Measure the pole at the actual bracket positions. The upper and lower mounting points may have different diameters.
How long does installation take?
Installation time depends on the motif size, working height, access equipment, fixing system and site conditions. A schedule should be prepared for the specific project.
Can the lights be installed in windy areas?
Installation may be possible when the pole, motif and mounting assembly have been assessed for the expected wind conditions and approved by the responsible authority.
Can the design and dimensions be customized?
Yes. Motif shape, height, width, LED color, lighting effect and mounting arrangements can be selected according to the project requirements.
Can you help plan a street lighting layout?
Yes. Street length, pole spacing, photographs, installation heights and preferred motif designs can be used to prepare preliminary layout suggestions and product quotations.
Plan Your Pole Mounted Street Lighting Project
Share your pole photographs, mounting heights, diameter measurements, street length and preferred LED designs. HYCLIGHT can help prepare motif size recommendations, custom product options and an initial layout proposal.